
Have you ever wondered how Folk Art is created?
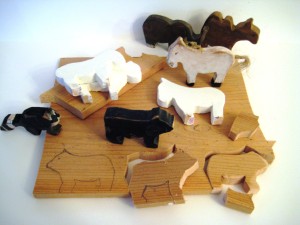
One of the Folk Art items I enjoy creating is Noah’s Ark. I create the Ark from reclaimed wood that I salvage from demolition sites or old homes. Along with the ark I include a number of small wooden animals.
Following is my step by step method of creating wood animals from reclaimed wood:
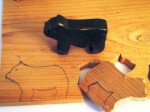
1. The first step is to design the animal on paper and then carefully cut it out and laminate the design for a tracer that you can utilize over again for future animals. That would be a practical thing to do.
Or you can do as I do and draw the animal directly on a piece of suitable wood, which is my quick and easy no nonsense preference. Each animal becomes a ‘one of a kind’ with its own irreplaceable character.
2. When the outline of the animal is drawn onto the wood it is essential to cut it out. I use a scroll saw; I love this little saw and have used it for many years.
It was a present from my supportive husband who recognized early on in our life together that I was not the kind of woman who cared highly for roses or bling, but one who would appreciate the value of a sharp saw or belt sander. I have cut through many a board with this little saw, broken many a blade and stained wood with my blood.
3. Once one of Noah’s animals emerges from the piece of reclaimed wood the next step is to sand the rough edges. You can use a medium weight sand paper and do this by hand.
I utilize a belt sander, another gift that thrilled me more than a mix master would have. Many a knuckle has been sanded and skin lost, during this procedure!
4. As soon as the animal feels smooth all over the fun of painting begins. I use old house paint.
This is an efficient and practical way to recycle products that could end up in the landfill. Fortunately I find painting the house, inside and out, a pleasant and meditative pastime, so I am never short of dribs and drabs of paint.
5. After a base coat I apply the appropriate color and once it dries I apply a second coat. A bit more sanding, then an application of varnish or stain or wood wax depending on the amount of distressing I might do.
Additional details such as some hemp rope for the tail and mane on the horse are added.
The finishing touch on all the animals is to add the eyes. This last step ensures that the animals come ‘alive’!

Deb
July 26, 2013 at 12:03 am
Love it! Great idea and great work!
julietwilson
May 3, 2013 at 6:42 am
your animals look great and what a cool way to recycle discarded wood!
Juliet
http://craftygreenpoet.blogspot.com
peko1012
April 9, 2013 at 5:31 pm
Very cool and fun! I think they turn out amazing!
BlackCrowCurios
April 9, 2013 at 9:57 pm
thank you!
Milorne
March 17, 2013 at 1:46 am
Let it rain. This looks like it is time consuming and satisfying work!